
Read the latest articles on Selnoviktech.com
Simplified Connectivity: Quick Guide to Automatically Set Private DNS on Infinix Phones
Are you looking to enhance the internet speed on your Infinix phone without the hassle of manually configuring DNS settings? This article outlines a straightforward method to automatically set private DNS, providing you with a faster and more stable browsing experience. Follow these steps to effortlessly improve your connection.
Steps to Automatically Set Private DNS on Infinix Phones:
Open Settings:
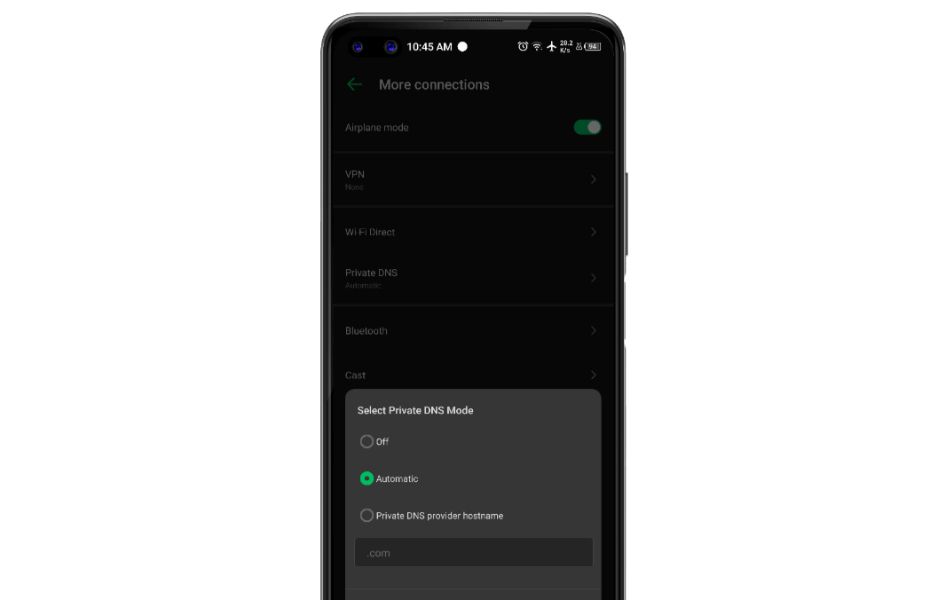
Start by opening the Settings app on your Infinix phone.Navigate to Network and Connections:
Look for and select the option related to networks or connections. This might be labeled as “Network & Connections” or a similar variation.Enter Wi-Fi or Mobile Data Settings:
Depending on the type of connection you’re using, enter the Wi-Fi or Mobile Data settings.Choose the Connected Network:
Find the network you are currently using and open the additional options menu by tapping or holding on the network.Select “Automatic” or “DHCP” Option:
Look for the option that allows the device to automatically configure DNS. This is typically labeled as “Automatic” or “DHCP” for both IP and DNS addresses.Save the Settings:
After choosing the automatic option, save or apply the settings. Some devices may require you to tap the “OK” or “Save” button at the bottom of the screen.Restart the Connection:
Make sure to turn off and turn back on the Wi-Fi or Mobile Data connection to apply the changes.
By following these steps, your Infinix device will now automatically handle DNS configuration, bringing you convenience without the need to manually input settings. Feel the difference in internet speed and stability!
喜欢我的文章吗?
别忘了给点支持与赞赏,让我知道创作的路上有你陪伴。
发布评论…